Step 1: Log in to Appmint:
Begin by logging into your Appmint account. You will be directed to the main dashboard.

Step 2: Access the Database Section
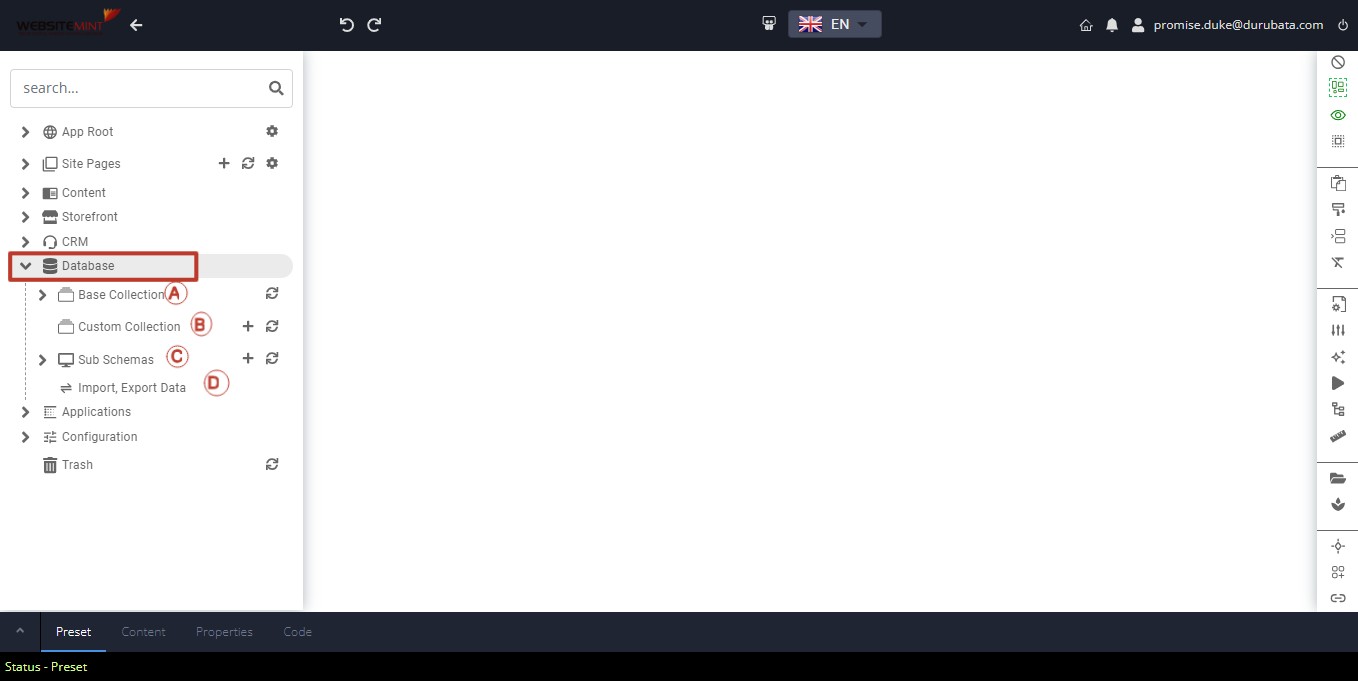
- Click on the Database dropdown in the main menu. You will see the following options:

- A. Base Collections: Pre-built data that comes with the application.
- B. Custom Collections: Data structures you create yourself.
- C. Sub Schemas: Useful for nesting a specific data structure within another parent data structure.
- D. Importing and Exporting Data: Facilitates data migration in and out of Appmint.
C. Sub Schemas
Sub Schemas are useful for creating a data structure within a parent data structure, especially when the child structure needs fewer or unique details compared to its parent.
Adding a Subschema
Subschemas are useful when you need a specific data structure inside another data structure, with possibly fewer details than its parent schema. Follow the steps below to add a subschema:
- Enable Subschema on Parent Collection:

- Navigate to the parent custom collection where you want to attach the subschema.
- Click on the Settings (Gear Icon) of the custom collection.
- Enable the option for Subschema.
- Add the Subschema:

- Go to the Subschema dropdown within the custom collection interface.
- Click on the Plus Icon (+) to add a new subschema.
- In the Parent Collection dropdown, select the parent collection you enabled in the previous step.
- Configure the Subschema:
- Drag and drop the elements you want to include in the subschema.
- Once you're satisfied with the structure, save your collection.
This process allows you to manage complex data structures more efficiently by nesting schemas as needed.
Conclusion: Sub Schemas in Appmint enable efficient management of complex data structures by allowing you to nest specific schemas within a parent collection, streamlining data organization and customization.


